|
In
the first game both sides calmly tried to surround territory. In the
second example the players want to fight and try to capture each other's
stones.


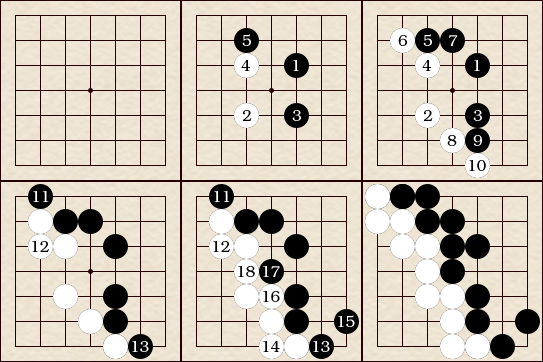
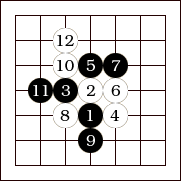
Diagram
6: (moves
1 - 12) White tries to complicate the game and create fights
by cutting the two armies into smaller groups that threaten to capture
each other.
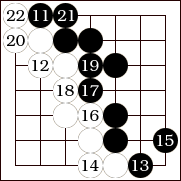
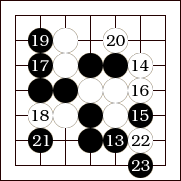
Diagram
7: (moves 13 - 23) The battle continues.
With each move the players try to expand the area they control while
threatening to capture some opposing stones. Now the Black stone 15
is about to be captured.


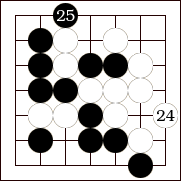
Diagram
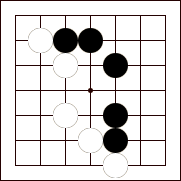
8: With
move 24 White captures a Black stone, which is removed from the board.
Black 25 threatens to capture two White stones.
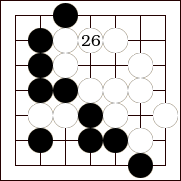
Diagram
9: White replies with 26, capturing two more Black stones
and saving the White stones that were in atari. White keeps the three
captured Black stones by the side of the board, to be used later in
counting the score.


Diagram
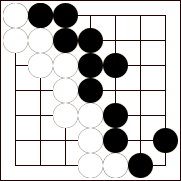
10: (moves
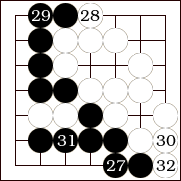
27 - 32) The fighting is over and the players fill in the
last empty spaces (called dame) between their armies. After move
32 there is nothing more to be done. Note that two White stones are
trapped behind the Black wall. Black does not need to play another move
to capture these stones because they no longer can make any threat.
As you will see, it will be bad for Black if he does capture!
Diagram
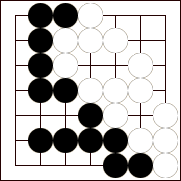
11: After both sides have passed, it is time to count
the score. First Black removes the two dead White stones from the board,
to give this position.


Diagram
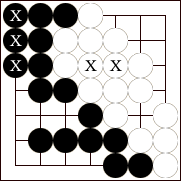
12: Next
the players place the stones they have captured inside their opponents'
territory. The three captured Black stones and the two White stones
just removed at the end of play (marked with X's) are placed back on
the board, inside area surrounded by the same color. See how the captured
stones reduce the surrounded territory.
Diagram
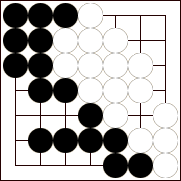
13: In the final position Black surrounds 9 points and
White surrounds 8, so Black wins by one point. Note that if Black had
captured the two White stones during the game, Black would have one
point less and would not have won the game.
|

